My Cessna Sim Project

My Cessna Sim Project
To visit my project web site click on the image above or go to: www.mycessnasim.info

Sunday, November 27, 2011

The extended weekend after Thanksgiving gave me a few more hours to get things done.  I focused on two major areas: the completion of the undercarriage; and the build out of the lower instrument panel.  I got some great help  from one of my brothers and from my wife which made things go much quicker.

I was able to finish constructing that "temporary" undercarriage that I've now decided will be permanent. That being the case I'll be doing a few cosmetic improvements on it in the near future and will then paint it black.

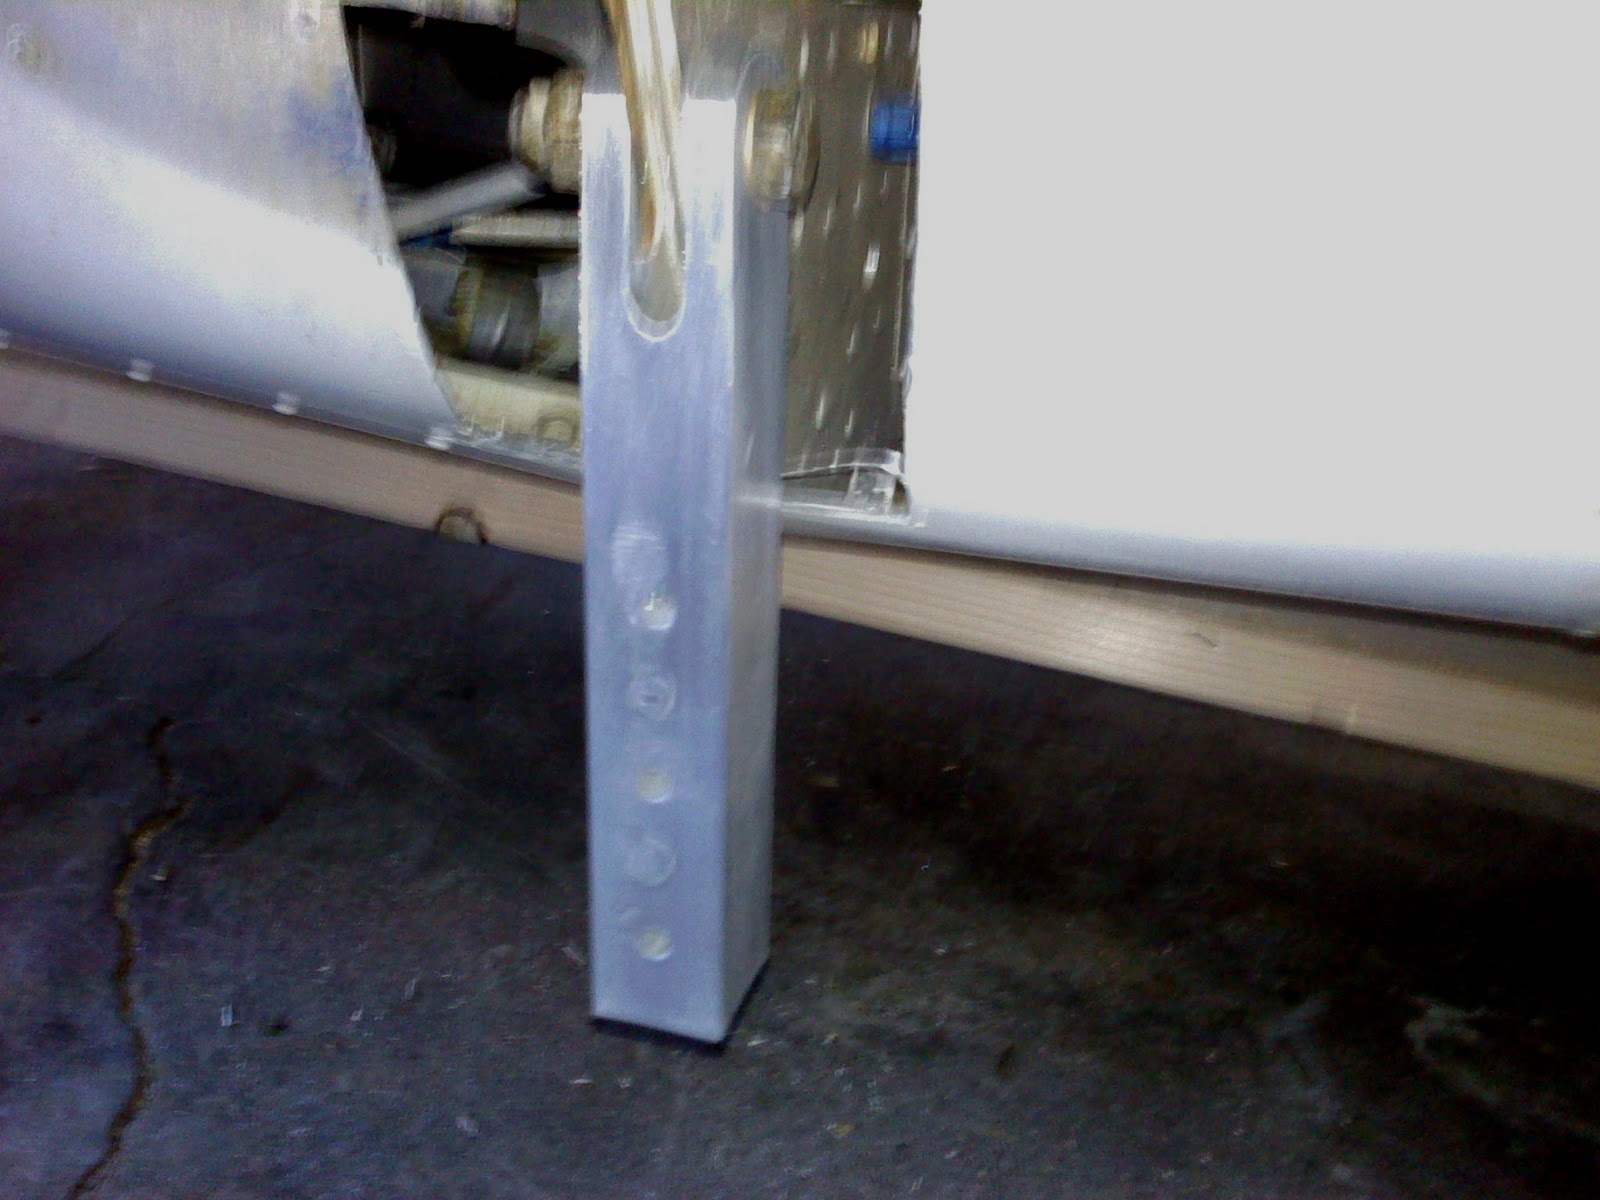
  Last weekend I posted pics of how I used the landing gear mounts for the back of the undercarriage.  For the front I took advantage of three points that were structurally stronger than other parts of the air frame, the section of frame where the nose gear mount attaches, and the two wing strut mounts.

The salvage yard cut the wing struts off about 8" away form the fuselage which left the 1" square x 6" long mounting arm intact.  I had to grind the rivet heads off to get the last of the wing strut sheet metal off the mounting arms and also trim back some fuselage sheet metal and cut away part of the frame to allow them to swing strait down.  With that done I was able to bolt them to the newly made undercarriage.  My brother and my wife gave me a great deal of help this weekend and that made for much easier work and allowed me to get it done in about half the time.

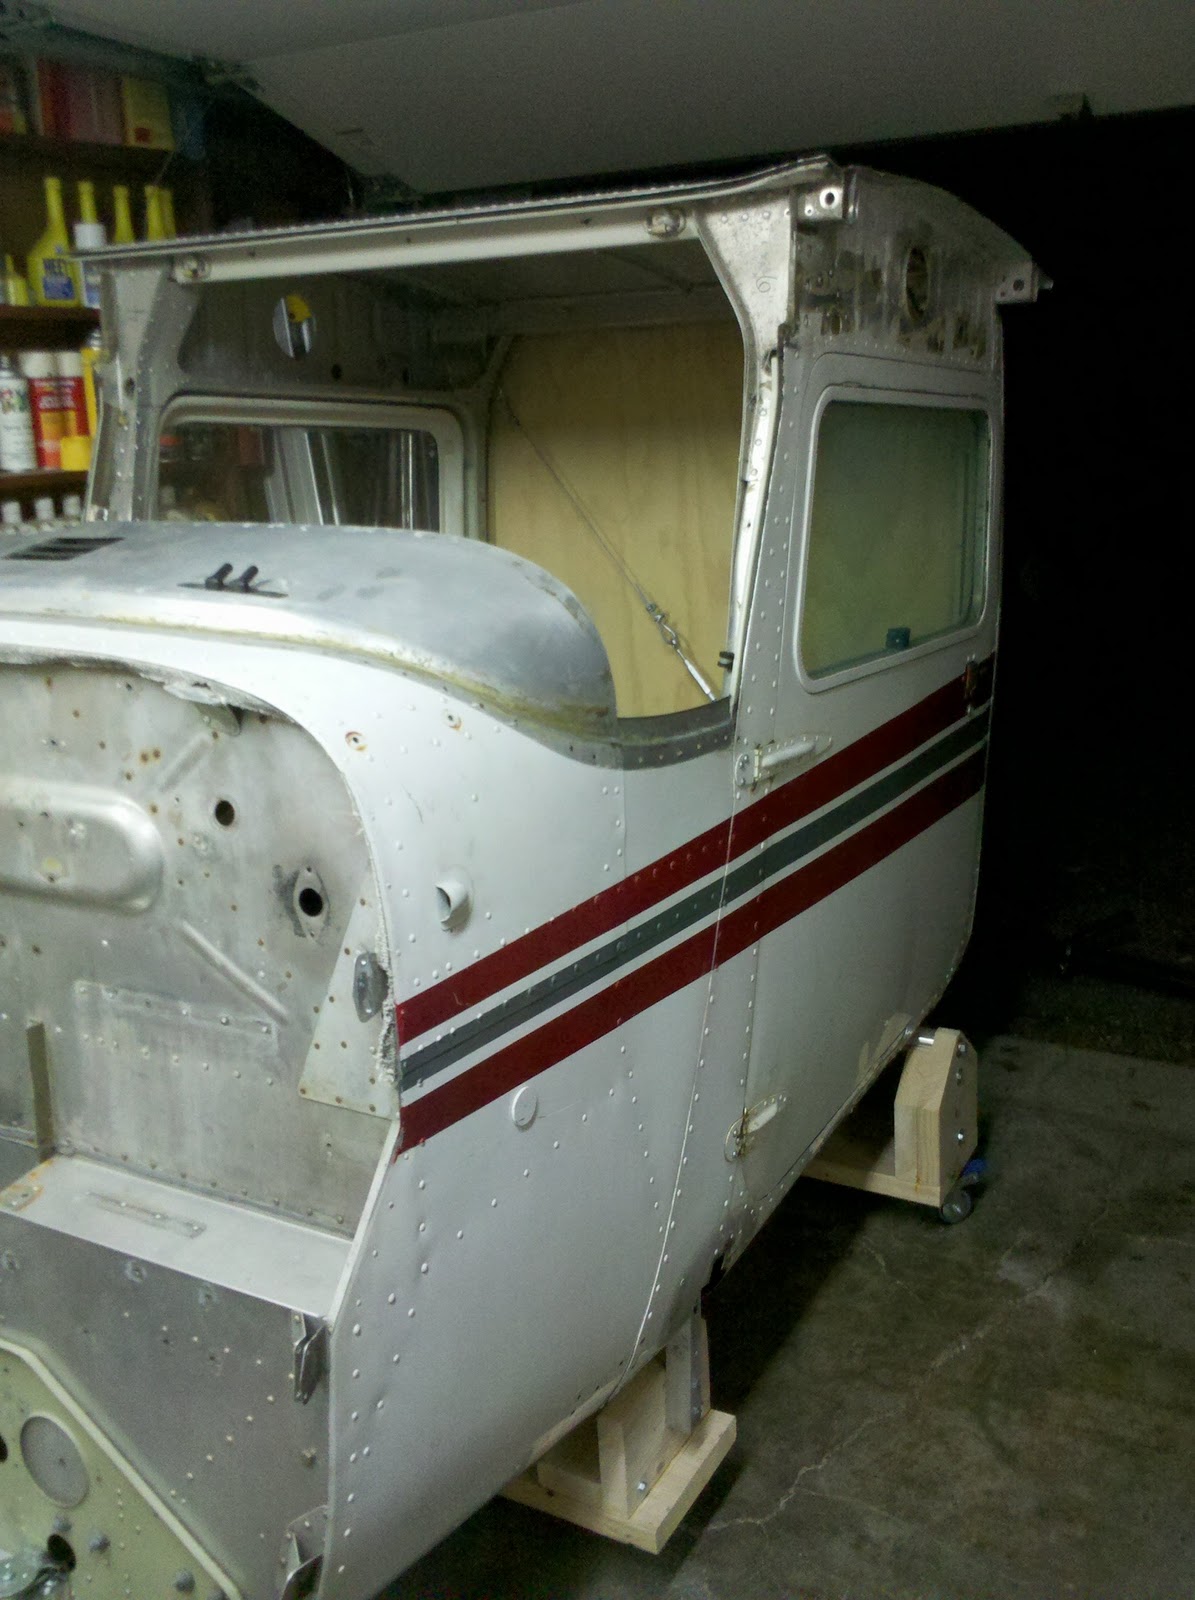
It'll look a lot more aircraft like when I get he windshield installed, more about that below, and even more so when I get he upper engine cowl and nose bowl mounted.  I just picked up both pieces on eBay, but there was some damage in transit so I'm working it out with the seller.  In the interim I'm also on the hunt for the correct fasteners to install it and designing a support frame to make up for the fact that there will be no lower cowl to support it.  I want to keep it removable for maintenance purposes and to allow easier access in the future when I look at adding  a force feedback system to the yoke and rudder pedals.  As mentioned before, after all that I'll be making some end caps to cover where the wings were mounted and a back cover.  I'm also working on several ideas for cockpit ventilation and hoping to take advantage of the existing air ducts including those located in the forward inside edge of the wing ends where they would have come up against the windshield.      

For the lower instrument panel I had to cut out a few more switch spaces for some of the unique I/O I'm adding  to emulate a few different aircraft.  This included adding a prop pitch control, a landing gear switch (a bit of a squeeze and compromise on the positioning), a second split master switch, and an A/B center off switch.  The last two are part of what I'll be doing to emulate twin engine configs like the 337 Skymaster.  Those switch additions also required that I relocate a couple existing switches like the carb heat, alternate static source, and cabin/panel dimmer control.  I purchased the plastic trim cover blank from Dawson Aircraft.  Because it comes in as a blank I had to trim it to fit, then mark and cut out all the switch and cable holes.  This is where my wife's eye for detail and exceptional patience comes in.  My brother and I marked it up and did the rough cuts, then turned it over to my wife who did a great job with the detailed finish cuts.

After that it was time to install it and begin mounting the various switches and cables.  Some for test fit purposes before final modifications others are there permanently waiting for the wire harness to be installed.  I'm now on the hunt for a couple more switch bezels for the split master switch and avionics mater switch.  Two other thing I'll be changing: 1. Because I didn't recess all the screws behind the panel I'll be changing out those that show (like the six holding in the landing gear switch) for flat head black anodized hardware; and 2. Three of the generic switches I purchased came with chromed knobs, those will be replaced with either original Cessna, or at least Cessna like knobs.  The other puzzle piece yet to be put in place is a complete set of circuit breakers.  I installed the originals that I had and may actually use a few for some of the 12 volt systems but I'm also considering some simulated breakers that could be tripped via FSX offsets through FSUIPC and FS2Phidgets via a Phidget relay card.  For the balance of the breakers they'll either be dummies, or push button switches used to trigger simulator functions from within the cockpit.

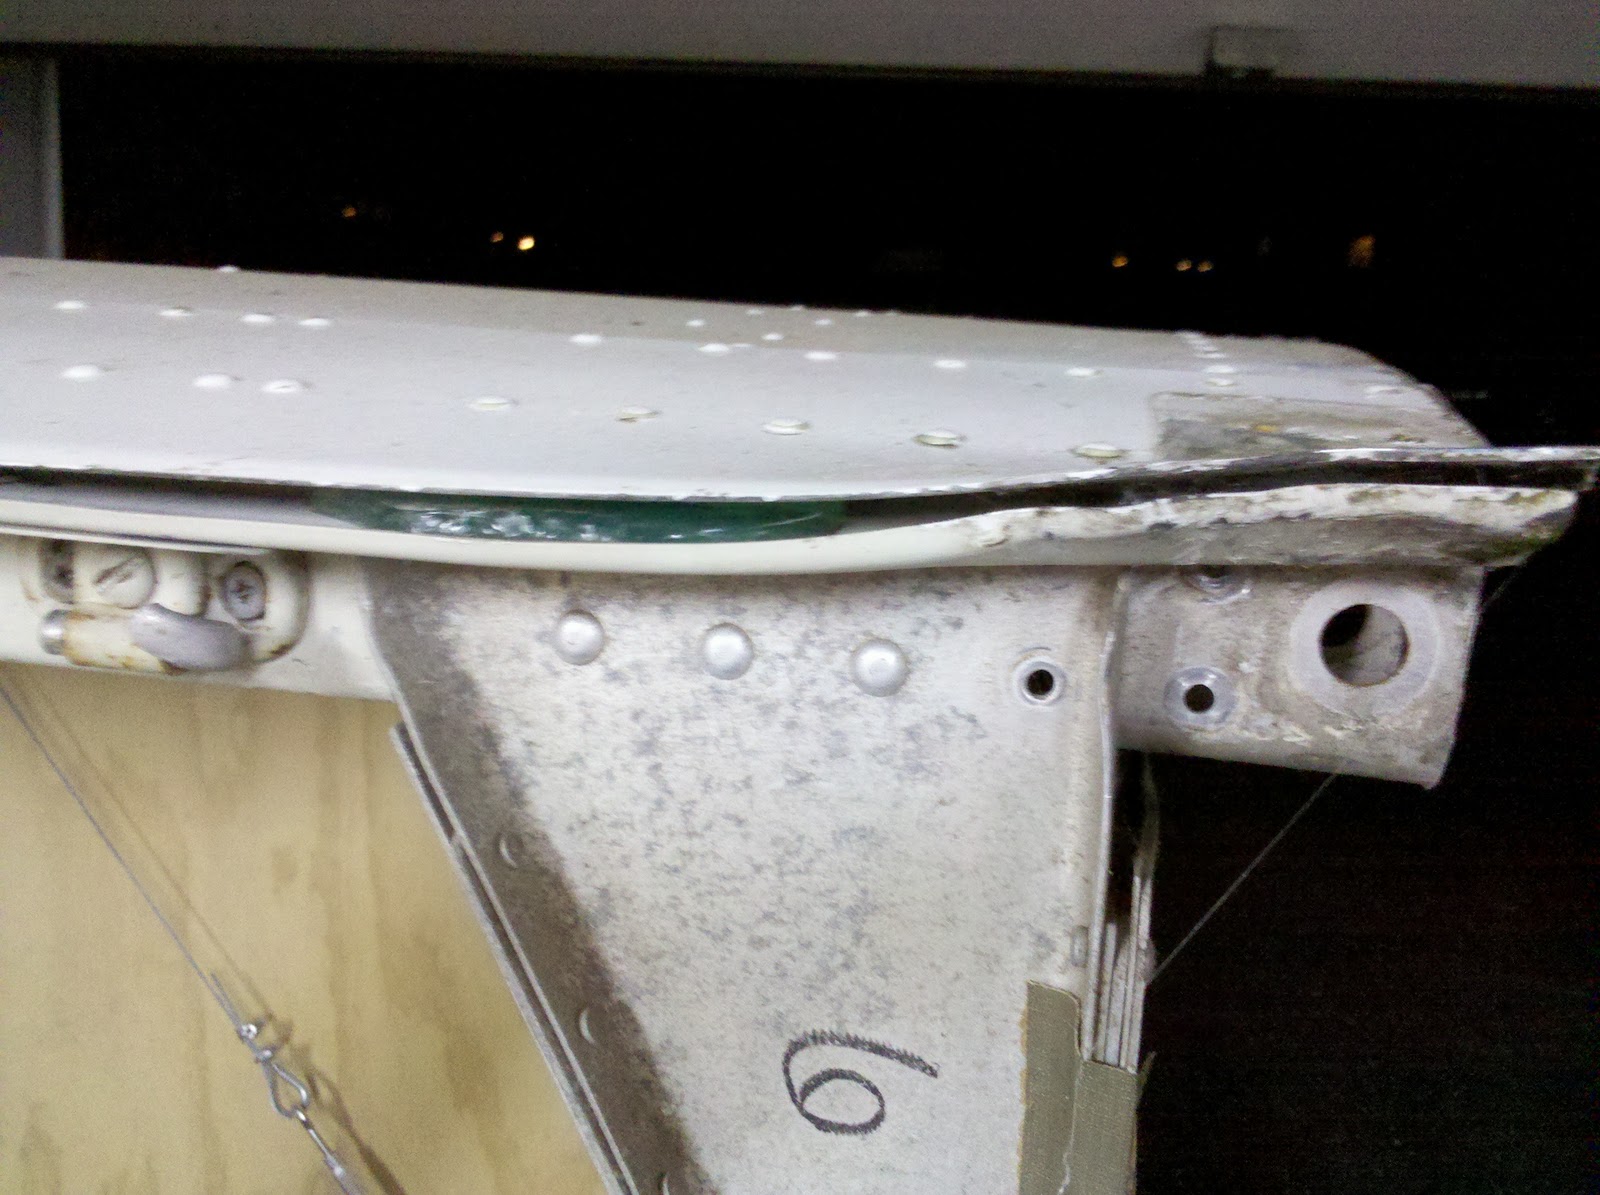
I did manage to squeeze in one last piece of work, or at least start it, before wrapping things up.  Planning ahead and thinking about the windshield install in a couple months I started to repair the damage to the upper mounting slot.  There was no apparent damage there in the post accident pictures so I'm assuming that was the result of some expedient wing removal at he salvage yard.  Regardless though it needs to be repaired before the new windshield goes in.  I was a little concerned based on my experience trying to rework some of the other fuselage skin.  However the being a slightly heavier grade of metal it was a little easier to reform without any stress cracks forming.
It turned out to be fairly easy to fix the upper skin with a little persuasion from a rubber mallet and some carefully placed blocking,  The lower lip though is a bit more difficult due to the folds in it that must maintain proper dimension to allow the upper lip of the windshield to slide through.  That will require some additional work to reform the original shape and I'm going to make up a small steel tool to reshape it.  With that done all that's left to do before installing the windshield is to get the dash panel upholstery glued back in.  I have the material ordered but no word on it coming in yet.   Plenty of time to work on that though since the windshield isn't in the budget until the January/February time frame as I mentioned last week.  Unless of course Santa is real good to me at the end of the month . . . ;-)

So, that's all for now.  Not sure how much time I'll have over the next couple weeks to get more done, but I'll be sure to post another update when I get a little further.  Thanks for the guestbook posts on the main web site and please don't hesitate to add some comments to the blog as well.

Sunday, November 20, 2011

A lot of sub assembly work done, but no big pieces.
To allow me to build several of the wire harnesses outside the cockpit I built a nail board, a full scale mock up of the instrument panel and part of the firewall with finish nails used as wire guides and termination points.  I have about 1/2 of the instrument panel switch wiring done, about 200' of wire.  This wire harness will be installed after I get all the lower panel switches installed.  Because I installed my  BU0836A on a mounting
board with terminal strips I was able to terminate the harness on it and this allowed me to test each connection through to FSX as I progressed.  The next two USB encoder cards I purchase will be the newer BU0836X cards and those will be mounted on the cockpit side of the fire wall.  Those will pick up the switches and pots in the center console to include the 3 trims, the cowl flaps, fuel selector valve, and others.  The density of the wiring in this area makes this approach ideal.  For other sections I won't likely use a nail board.  Instead they will be wired in place or use small free hand wire harnesses.

The next small sub assembly started was the engine controls, throttle, prop, and mixture.  Although just started and I still need to order the potentiometers and design a mounting bracket for each.  Those will be part of the mix in my next round of material purchases.  I also need to find the large fine thread nuts needed to mount the controls in the instrument panel, I have one so far out of the three needed.  These controls are cut down from actual Cessna cables I found on eBay.   Each cable sheath was removed and the cable core left long enough to use the full travel of a 100mm slide pot.

The one piece of heavy lifting this weekend came while making a temporary under carriage for the fuselage.  It came out well enough that I may decide to add a mid support and finish it in back as the permanent under
carriage.  The rear mounts took advantage of the existing landing gear supports in the fuselage.  Having machinists in the family is a great thing.  I had two 12" long 1 7/8" diameter aluminum shafts made to press fit into the landing gear mounts.  Each had the ends drilled out and threaded to receive a 1/2" bolt.  My original idea was to fabricate a steel under carriage that these would bolt to, but as I said, my temporary wood frame is coming out good enough that I might consider keeping it.  If I do I'll add one more set of mounting points using the attach points from the wing struts witch I previously removed.  With the two additional casters the weight should be well distributed and the fuselage stable even with both seats occupied.  Of course, I'll have to paint it as well.

Here are a couple pics of the mounting shaft and the mounting frame installed.  Each shaft end had to be tapered and then hammered in.  The temporary mounting frame is made up of 2"x10" lumber glued and lag bolted together.  It's made such that the landing gear mounting bars drop in and are bolted from the ends.  In the event that I have to access the underside of the fuselage the mounts also allow for it to be tipped up.  Hopefully a rare event, but I did cut some rather large access holes on the underside to install some of the rudder linkage and may also need to      
access it again when I install the elevator centering springs and position sensor.  After that I'm hoping not to have much need for that feature.  I also have the undercarriage up on 3" swivel casters to make it easy to move around during the build.  Those will most likely come off when the fuselage is positioned in front of the projection screen.  As can also be seen in the pics I have the rear bulkhead in place.  I'll be mounting surround left and right rear speakers through it and either through or on it inside a surround sub-woofer.  The interior surface will be covered in carpet and the exterior will have a cover made and held on with thumb screws of some type.  Another idea I am looking at will be to mount a web cam on the interior of the bulkhead to allow for over the shoulder video during flight.

Well, that's what I've been up to for the past few weeks now.  I'm hoping to get some more work done over the Thanksgiving holiday to include installing the lower switch panel.  Very early in December I'm planning to order the hardware I need to fabricate the elevator, aileron,and rudder linkages and position sensors.  I'm going to try and get those linkages built and get the position sensors hooked up and tested before Christmas.  After that I'll install the yokes, the cowl deck cover and the glare shield.  If all goes well I'll be ready for the windshield install in the January or February time frame.  After that, maybe in the Feb/Mar time frame I'll be able to design and fabricate the end caps that will enclose where the wings were previously installed.

So now I've put some of the near term plans in writing in the hope that I can hold myself accountable to the plan I just published.  I may have to slip things a month for budget reasons but I hope not much more than that.  That's all for now . . .

 HAPPY THANKSGIVING!!!

Friday, November 11, 2011

In the beginning . . .

So who knew 30+ years ago when I was sitting in front of my Commodore 64 pc flying Microsoft's Flight Sim Version 2 (actually I'll have to go dig through my basement I think back then it was made by Sub-Logic) that I would eventually have a Cessna 172 fuselage and be converting it into a full scale flight sim cockpit.

If you've read the home page at my project website MyCessnaSim.info then you already know a bit about my history with aviation and flight sim'ing.  The site is only a few hours older than this blog and not yet fully built out. I'll be adding to it over the months ahead and trying to keep you posted on my progress through this blog and the website.

I purchased the fuselage in the spring of this year and started a process of planning and building that included a feverish search on e-Bay and through several aircraft salvage yards for all the pieces needed for the build.  I anticipate the project taking about two years to get it to the a "flyable" state.  And, have several upgrade ideas for future phases that will further add realism and enhance the illusion of flight.

My goal is to create as real a flight illusion as possible in a very Cessna-esque but generic General Aviation sim-pit.  My initial flight models will include the Cessna 172, 182, and 337.  Having both single and twin engine configurations presents a few challenges.  As a firm up my plans on how to overcome those challenges.  Later flight models will include the Beach Baron and other conventional twins.

Hope you are able to follow my progress and if you aren't already building a sim-pit, I hope this blog and my website spark your interest.  Sim-Pits come in all shapes and sizes and can be made for as little or as much cash as you choose.  Hope to see you in the virtual skies!

Tom G.